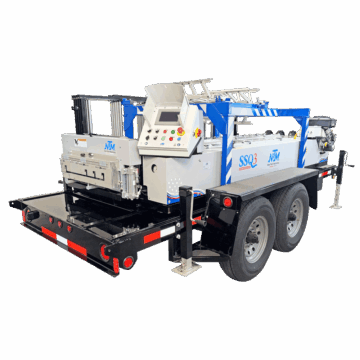
Changing Coil Widths on a New Tech Machinery SSR™ MultiPro Jr.
Do you know how change a coil width on NTM's SSR MultiPro Jr. Roof Panel Machine? Find out how in this step-by-step article and accompanying video.
/Rick Zand/4 min read
Knowing how to properly change coil widths on your SSR MultiPro Jr. Roof Panel Machine will help prevent oil canning and panel distortion. In this step-by-step guide, you will learn the process of changing coil widths.
At New Tech Machinery (NTM), we’ve helped metal contractors by providing the highest quality portable rollforming machines and machine support. We feel it’s important to educate our machine owners on how to operate their machines to their full potential. This includes showing you how to make adjustments to the machine and tooling when necessary.
Here’s the process for performing a width changeover on an SSR MultiPro Jr. Roof Panel Machine:
Safety Precautions: Verify that all machine covers are securely in place. Apply a lockout tagout to the power plug to prevent accidental activation. Shear is in the up-and-lock position. ALWAYS WORK IN FRONT OF OR BEHIND THE SHEAR. NEVER WORK THROUGH THE SHEAR.
Removing Machine Covers: Follow the instructions in the manual carefully to remove the machine covers without forcing any parts.
3. Width Adjustment
Adjusting Entry Guides:
Cut Material: Cut off a piece of material and cut the corners off to feed into the guides (e.g., 18 inches).
Insert into Guides: Slide the material in, loosen the left entry guide collar and slide it into the material without using too much pressure.
With a 3/16″ T-handle, adjust the collar and tighten for snug fit. Remember, the right side is stationary; only adjust the left side to match the material width.
4. Rail Alignment Process: Align and adjust the L1, L2, and L3 rails in sequence. Check each rail for perfect alignment and secure them with D-bolts.
Setting Rails:
L1 Rail: Move it inwards to the B position (1 inch mark in this case). Tighten the D-bolts and measure the distance to the string for verification.
L2 Rail: Loosen the D-bolts, slide the rail until it aligns flush with the spacer, and tighten. Repeat the measurement step.
L3 Rail: Loosen the D-bolts, slide the rail to align flush with the L2 rail, and tighten. Measure alignment for accuracy.
5. Shear Dies Adjustment: Sheet feed a 4′-5′ piece of material through the machine. Align the left shear dies as the material passes through, ensuring the right side remains stationary.
6. Resetting Drum Rollers: Adjust the drum rollers to match the new width of the material. Center them accurately and securely tighten.
7. Shear Dies Alignment: Position both the outside and inside shear dies correctly with the material in place. Once aligned, secure them firmly.
Center the outside dieCenter the outside die, then align the inside die.
8. Test Cut Procedure: Remove the lock-out tag-out and plug in the machine. Perform a test cut, moving the material slowly through the shear to make sure it’s aligned.
Check for any imperfections and measure to check the dimensions of the profile. Make any adjustments needed after reapplying the lock-out tag-out. If the dimensions are correct, proceed to feed the material from the coil roll.
9. Finalizing the Setup: After ensuring the adjustments are correct and the test cut is satisfactory, replace all covers on the machine. Check to ensure the machine is properly set up for its new task.
Now you should be ready to run panels for your next job!
Check out our Learning Center for informative articles and videos about NTM rollforming machine operation, as well as industry updates, events, and more.
Resources:
Refer to the provided manual or the accompanying video tutorial for more detailed instructions and visual guidance.